

COMMERCIAL CLEANING PROCEDURES – A COMPLETE GUIDE
SE Commercial Services are experts in all things Commercial Cleaning. Before undertaking any cleaning task, it is important to have the correct equipment and cleaning solutions in place. A standardised process should be followed to ensure that the task is carried out safely and effectively. Below we have provided a handy list of the common Commercial Cleaning tasks, the equipment needed, a step-by step procedure and safety considerations for each task.
EQUIPMENT
1 Spray Bottle
1 Single Solution Mopping System
1 Toilet Brush
1 Bottle Brush
1 Pair Tweezers
1 Bucket
Colour Coded Cloths
Cleaning Agent & Dispenser
Rubbish Sack
Non Abrasive Pad
Protective Gloves
Warning Signs
METHOD
- Assemble check equipment. Place warning signs. Open windows for ventilation.
- Prepare cleaning solution in the mop bucket and spray bottle according to the manufacturers instructions, adding the solution to the water.
Water Closets
- Flush toilet with the seat lid closed. Reveal water line by pushing back the water in the toilet bowl with the brush. Apply toilet cleaner to inside of bowl including under the run. Allow to activate.
- With the spray unit, spray outside of W.C. around the pipe work, interior and exterior face of the seat lid, the exterior surface of the cistern, all furniture, fixtures and fittings, partitions and walls.
- With a cloth, wipe the walls, partitions, cistern, exterior and interior surface of the seat lid, furniture, fixture and fittings, pipe work and the exterior of the W.C.
- Scrub inside of the toilet bowl with brush, especially any stains, the water line and under the run. Flush toilet, rinse brush in flushing water. Replace brush in holder.
Urinals
- Flush the urinal and turn off the flushing system (if applicable). Clear urinal channel and waste outlet with the tweezers. Place in rubbish sack.
- With the spray unit spray the urinal from bottom to top to include all pipe work, cistern and furniture, fixtures and fittings.
- With the toilet brush or non-abrasive pad clean the urinal to remove all marks and stains. Pay particular attention to water marks, the drain and channel. With a cloth wipe all the pipe work, furniture, fixtures and fittings.
- Turn on the flushing system and flush the urinal.
Showers
- Remove debris from around the drain hole with the tweezers. Place in the rubbish sack.
- With the spray unit spray the shower from bottom to top, including walls, tiles, furniture, fixtures and fittings, including curtain rail (if applicable).
- With a non-abrasive pad remove marks and stains from all surfaces. With a clean cloth wipe all surfaces, furniture, fixtures and fittings working from the top down.
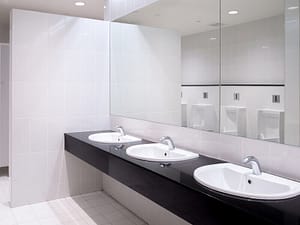
Wash hand Basins
- Remove hair / debris from the plug, plug hole and chain with the tweezers. Place in the rubbish sack.
- With the spray unit spray the wall, ledges, pipes, underneath the basin, the basin surrounding tiles, mirror, furniture, fixtures and fittings.
- Use the non-abrasive pad to remove marks / stains from all the surfaces. With a cloth wipe all surfaces. Work from the top down.
- With the tap running rinse the basin, swilling water into the overflow. Use bottle brush to clean the overflow. With a clean cloth wipe the taps inside and outside of the basin, underneath the basin, all pipes and ledges.
Toilet Floor
- Starting from a point furthest from the door, mop the floor using a figure 8 stroke with each pass overlapping. Mop adjacent to the edges by cutting in parallel. Remove splashes to walls as they occur with a clean cloth.
- Leave the floor as dry as possible. When all areas have been cleaned, clean the equipment and return to the store.
SAFETY
- Protective gloves must be worn. The correct colour coded equipment and cloths must be used. They are not permitted to be used on any other areas.
- Never mix cleaning agents or solutions as poisonous gases may result.
- Do not use abrasive pads or cleaners as scratched surfaces may harbour harmful bacteria.
- When using the spray unit, expel excess pressure by releasing the valve before opening the tank.
- Do not use soaps as these may make the floor slippery. Use as little water as necessary.
- Check handles are smooth (rough handles may cause splinters). Do not leave equipment lying around.
CARE OF EQUIPMENT
- Wash the spray unit, wipe with a clean cloth, store upside down.
- Wash buckets wipe with a clean cloth and store upside down.
- Wash bottle brush and tweezers hang up to dry.
- Remove mop head from the handle (if applicable) wash and allow to dry. If re-assembled, store head up.
- Wash out cloths and hang up to dry.
- Clean the toilet brush before returning it to its holder.
EQUIPMENT
1 Trigger Spray
1 Bottle Brush
1 Pair Tweezers
1 Stiff Hand Brush Cleaning Agent & Dispenser
Colour Coded Cloths
Protective Gloves
Rubbish Sack
Warning Signs
METHOD
- Assemble check equipment. Place warning signs. Put on protective gloves.
- Prepare cleaning solution in trigger spray, according to the manufacturers instructions, adding the solution to the water.
- Remove objects from the basin / sink e.g.: soap. Remove hair from the plug, plughole and chain with the tweezers.
- Spray the basin / sink both inside and out, tile surround, splashbacks, ledges, pipes and taps. Spray underneath the basin / sink. With a clean cloth, clean the underside of the basin / sink to include pies, ledges and sink supports.
- Clean the tile surrounds, splashbacks, mirrors, ledges and pipes. Spray cleaning solution into the basin / sink, wipe with a cloth. Use bottle brush to clean the overflow. Turn on tap rinse out the cloth, wring out almost dry, and wipe all surfaces. Buff all surfaces with a clean dry cloth.
SAFETY
- Wash out bottle brush and tweezers hang up to dry.
- Wash and rinse out trigger spray. Store upside down.
- Rinse hand brush under the tap. Store head up.
- Wash out cloths and hang up to dry.
EQUIPMENT
1 x Vacuum Cleaner,
1 Long Handled Scraper
Lobby Dustpan & Brush
Rubbish Sack
Warning Signs
METHOD
1. Assemble check equipment. Place warning signs
2. Loosen chewing gum with the scraper. Pick up with lobby dustpan and brush place in rubbish sack. Pick up large items of litter and place in rubbish sack.
- Adjust height of beater brush / bar ( if applicable)on the suction cleaner to suit the surface. Cover the area systematically, using overlapping passes, paying attention to traffic lanes, edges and corners.
- Use the dustpan and brush to clean around and under furniture, fixtures and fittings.
SAFETY
- Check electrical equipment for safety, particularly plugs and cables. Do not plug suction cleaner in until it has been assembled and is ready for use. The cable must be kept behind the line of work, do not allow to become taut at ankle height.
- Do not leave equipment lying around. Check handles are smooth (rough handles may cause splinters).
CARE OF EQUIPMENT
- Wipe inside and outside of suction cleaner with a clean cloth. Empty wash filter bag when full.
- Clean scraper store head up. Clean dustpan and brush.
EQUIPMENT
1 Suction Cleaner
Dustpan & Brush
Rubbish Sack
Warning Signs
METHOD
- Assemble check equipment. Place warning signs.
- Pick up large items of litter and place in rubbish sack. Place chairs on desks.
- Adjust the height of the beater brush/bar to suit the surface. Cover area systematically using overlapping passes, paying attention to traffic lanes, under desks, corners and edges.
- Use the dustpan and brush to pick up litter, where the suction cleaner cannot reach i.e.: under furniture.
SAFETY
- Check electrical equipment particularly plugs and cables. Do not plug the suction cleaner in until it has been assembled and is ready for use.
- The cable must be behind the line of work at all times. Do not allow to become taut at ankle height.
CARE OF EQUIPMENT
- Wipe inside and outside of the suction cleaner with a clean cloth. Empty, wash the filter bag when full, and hang up to dry.
- Clean the dustpan and brush and return to the store.
EQUIPMENT
1 Soft Headed 12” Broom
1 Long Handled Scraper
1 Litter Grabber
1 Lobby Dustpan & Brush
Rubbish Sacks
Warning Signs
METHOD (For dry floors only)
Stairs & Landings
- Assemble, Check Equipment. Place warning signs.
- Pick up large pieces of litter with the grabber, place in rubbish sack. Remove chewing gum and loosen soil along the edges with the scraper, and place in the rubbish sack.
- On landings sweep using straight continuous overlapping strokes, ensure head is in contact with the floor at all times, maintain a leading edge.
- Sweep stairs using a straight continuous stroke, inside to outside edge; sweep one flight at a time. Pick up litter with dustpan and brush, place in rubbish sack.
Corridors, Walkways,
- Points 1 & 2 same as stairs and landings
- Sweep from furthest point to access point e.g.: walkway to entrance lobby, platform to stairwell. Loosen soil and chewing gum with the long-handled scraper. Sweep using straight continuous overlapping strokes, ensure head is in contact with the floor at all times, and maintain a leading edge. Pick up litter with dustpan and brush, place in the rubbish sack. 4. Leave a traffic lane for safe access for client staff and other contractors. When all areas have been swept, clean equipment and return to the store.
SAFETY
- Do not leave equipment lying around. Check handles are smooth (rough handles may cause splinters). Do not move soil/litter from one area to another.
CARE OF EQUIPMENT
- Store broom and scraper with heads up, when dirty wash and hang up to dry.
- Oil tongs of the litter grabber
EQUIPMENT
1 Single Solution Mopping System (bucket, wringer, and mop)
1 Long Handled Scraper
Protective Gloves
Cleaning Agent & Dispenser
Colour Coded Cloths Rubbish Sack Warning Signs
METHOD Stairs & Landings
- Assemble check equipment. Place warning signs. Put on protective gloves.
- Remove chewing gum with the scraper, place in rubbish sack.
3.Prepare cleaning solution according to the manufacturer’s instructions, adding the solution to the water. Apply cleaning solution to the landing with a fairly well wrung mop using a figure 8 stroke with each pass overlapping. Clean adjacent to skirting by cutting in parallel.
- Mop stairs from inside edge to outside, including the face of the steps using straight continuous strokes. Mop one flight of stairs at a time. Remove streaks and runs as they occur with a clean cloth.
- When wringing out the mop, stand in front of wringer and press down firmly (if applicable). Change the cleaning solution when dirty.
Corridors, Walkways,
1.Platforms Points 1 & 2 same as stairs and landings.
- Prepare cleaning solution to the manufacturer’s instructions, adding the solution to the water. Apply cleaning solution to an area of floor with a fairly well wrung mop. Mop from furthest point to access point e.g.: walkway to entrance lobby, mop using a figure 8 stroke with each pass overlapping. Clean adjacent to skirting and platform edge by cutting in parallel.
- Remove any splashes to walls as they occur with a clean cloth. Ensure the bucket is behind the line of work. Change cleaning solution when dirty.
- When all areas have been cleaned, clean equipment and return to the store.
SAFETY
- Wear protective gloves.
- Use as little water as it necessary. Do not use soaps as these can make the floor slippery.
- Mop only one flight of stairs at a time.
- Do not remove warning signs before floors or stairs are dry.
- Do not leave equipment lying around. Check handles are smooth (rough handles may cause splinters).
CARE OF EQUIPMENT
1 Remove mop head from handle (if applicable) wash and allow to dry, if re-assembled. Store head up.
- Wash bucket and wringer, wipe with a clean cloth, store upside down.
- Clean scraper and store head up.
EQUIPMENT
1 Double Solution Mopping System (2 buckets, wringers, mops)
1 Long Handled Scraper
Protective Gloves
Cleaning Agent & Dispenser
Colour Coded Cloths
Rubbish Sack
Warning Signs
METHOD Stairs & Landings
- Assemble check equipment. Place warning signs. Put on protective clothing.
- Remove chewing gum with the scraper, place in rubbish sack.
- In one bucket prepare cleaning solution according to the manufacturers instructions, adding the solution to the water. Fill the second bucket with clean water.
- Apply cleaning solution to an area of landing with a fairly well wrung mop. Mop using a figure 8 stroke with each pass overlapping. Clean adjacent to skirting by cutting in parallel.
- Mop stairs from inside edge to outside including the face of the steps, using straight, continuous strokes. Remove streaks and runs as they occur with a clean cloth.
- Rinse stairs and landings with the clean well wrung mop and water.
Corridors, Walkways & Platforms Points 1, 2, 3 same as stairs and landings.
- Mop from the furthest point to the access point e.g.: walkway to entrance lobby. Mop using a figure 8 stroke with each pass overlapping. Clean adjacent to skirting and platform edge by cutting in parallel. Remove splashes to walls as they occur with a clean cloth.
- Change cleaning solution when dirty.
- Rinse the floors with the clean well wrung mop and water.
- When all areas have been cleaned, clean equipment and return to the store.
SAFETY
- Wear protective gloves.
- Use as little water as is necessary. Do not use soaps as these can make the floor slippery.
- Mop only one flight of stairs at a time. Do not remove warning signs before the stairs or floors have dried.
- Do not leave equipment lying around. Check handles are smooth (rough handles may cause splinters).
CARE OF EQUIPMENT
- Remove mop heads from handles (if applicable) wash and allow to dry. If re-assembled, store head up.
- Wash buckets and wringers, wipe with a clean cloth, store upside down.
- Wash scraper store head up.
EQUIPMENT
1 Trigger Spray Bottle
1 Stiff Hand Brush
Bucket
Cooker/Oven Cleaner
Neutral Odourless Cleaning Agent & Dispenser
Cleaning Agent & Dispenser
Colour Coded Cloths
Protective Cloths
Protective Gloves
Rubbish Sack
Warning Signs
PREPARATION AND PLANNING
Protective gloves must be worn at all times. Before cleaning cookers and ovens the appliances must be switched off at the mains and the fuses removed. All other appliances must be unplugged. When cleaning interior surfaces and shelving of fridges only neutral odourless cleaning agents are permitted so that food placed in the fridge does not become tainted.
METHOD Cookers / Ovens
- Assemble check equipment. Place warning signs. Put on protective gloves.
- Prepare cleaning solution in the trigger spray, according to the manufacturers instructions adding the solution to the water. Fill the bucket with clean water. Fill a sink with hot water adding the cleaning solution.
- Remove grill rings, hob guards and oven shelves, place in sink and leave to soak.
- Spray cleaning solution onto the cooker / oven, bob top and control panels. With a cloth clean the surfaces. Use the hand brush to remove stubborn marks and stains.
- Place a clean cloth in a clean bucket of water, wring out almost dry and rinse wipe all the surfaces.
- Open cooker / oven door and spray all internal surfaces and internal face of the door with the oven cleaner. Allow 3 to 4 minutes for the cleaner to activate.
- With a clean cloth and stiff brush to remove stubborn stains clean the interior surfaces using straight continuous strokes.
- Place a clean cloth in the clean bucket of water, wring out almost dry, rinse wipe internal surfaces. Buff all surfaces with a clean dry cloth.
- With the hand brush clean the grill rings, hob guards and shelving, rinse under running water. Buff with a clean dry cloth and replace. Buff exterior surfaces of the cooker / oven with a clean dry cloth. Change the bucket of water as often as necessary.
Microwave Oven
- Assemble check equipment. Place warning signs. Put on protective gloves.
- Prepare cleaning solution in trigger spray, according to the manufacturers instructions, adding the solution to the water. Fill the bucket with clean water. Open the oven door and remove the tray and turntable.
- Spray internal surfaces and clean with a clean cloth. Spray external surfaces being careful near the control panel. Wipe with a clean cloth. Place a clean cloth in the bucket of water, wring out almost dry, rinse wipe internal and external surfaces.
- Spray cleaning solution onto a clean cloth, clean the tray and turntable, rinse wipe with a well wrung clean cloth, buff all surfaces with a clean dry cloth, replace tray and turntable.
Fridges
- Assemble check equipment. Place warning signs. Put on protective gloves.
- Prepare cleaning solution in a trigger spray, according to the manufacturers instructions, adding the solution to the water. Fill a sink with hot water, adding the neutral odourless cleaning solution.
- Switch fridge to de-frost mode. Remove shelves, salad tray and loose panels place in sink and allow to soak. Spray internal surfaces except the ice compartment.
- Wipe the ice compartment with a clean dry cloth.
- Place a clean cloth in a bucket of water, wring out almost dry, rinse wipe all surfaces.
- Spray external surfaces, rinse wipe with a well wrung clean cloth. Buff internal and external surfaces with a clean dry cloth.
- Clean trays, salad tray and panels with a clean cloth, rinse under running water, buff with a clean dry cloth and replace. Re-set fridge to normal setting.
SAFETY
- Cookers / ovens must be switched off at the mains and the fuses removed. All other electrical equipment must be unplugged. Protective gloves must be worn.
- Neutral odourless cleaning solutions can only be used to clean fridges.
- When using oven cleaner open windows for ventilation.
- When using oven cleaner, operatives must wear face masks and dispose of the protective gloves once the task has been completed.
CARE OF EQUIPMENT
- Wash out trigger spray, wipe and store upside down.
- Wash out bucket, wipe and store upside down. Rinse out hand brush, store head up.
- Wash out cloths and hang up to dry.
EQUIPMENT
Protective Gloves
Dusters Cloths
Bucket
Anti Static Cleaner
Furniture Polish (if applicable)
METHOD
The following method is used for the removal of dust and soil from electrical furniture. In no circumstances must water be used to clean electrical equipment. Ensure electrical equipment has been isolated from the electricity supply.
Dusting 1. Spray the anti static cleaner onto a dry duster. Wipe surfaces using smooth continuous strokes.
Polish Application 1. If equipment needs polish, apply spray furniture polish onto a cloth, wipe surfaces using smooth continuous strokes.
SAFETY
- Ensure electrical equipment has been isolated from the electrical supply before commencing cleaning.
- Wear protective gloves.
- Under no circumstances must water be applied to electrical equipment.
- Do not spray anti static cleaner directly onto electrical equipment.
- Do not spray furniture polish directly onto electrical equipment.
CARE OF EQUIPMENT
- Wash out bucket, wipe with a clean dry cloth, store upside down.
- Wash out dusters and cloths, rinse out and hang up to dry.
EQUIPMENT
1 Sharps Safe Box
1 Litter Grabber
Protective Gloves
Warning Signs
METHOD Handling
- Assemble check equipment. Place warning signs. Put on gloves.
- Use the grabber to pick up syringes and needles, place in sharps box. Close flap on sharps box, ensuring no needles are sticking out of the opening. Return the box to the store.
Storage
- Full or partially full sharps boxes must be securely stored under lock and key.
Removal
- When sharps boxes are full inform the Supervisor, who will arrange for collection. Dispose of according to Client & site procedures and local bye-laws.
SAFETY
- Protective gloves must be worn at all times. Do not pick up needles / syringes with bare hands.
- Needles / syringes must not be disposed of in any other containers except sharps boxes.
- In case of injury encourage bleeding, wash affected area with soap and water. Inform the Supervisor & Area Manager of the accident. Visit your doctor or hospital immediately.
- An entry must be recorded in the accident book.
CARE OF EQUIPMENT
- Oil grabber tongs, after use disinfect wipe with a clean dry cloth and return to the store.
EQUIPMENT
1 Trigger Spray Bottle,
2 Buckets Cleaning Agent & Dispenser
Colour Coded Cloths
Dusters
Furniture Polish
Furniture Gloves
Rubbish Sack
Warning Signs
PREPARATION AND PLANNING
The following methods are used for the removal or dust and soil from furniture. Dependent on whether the surfaces are dusty or soiled, will determine what method is to be employed. Care must be taken if an aerosol polish containing silicone is to be applied to furniture near or on a hard floor. The polish must be sprayed onto a duster and not directly onto the furniture, because if some of the polish falls onto the floor, it is likely to cause a slip hazard.
METHOD Dusting
- Assemble check equipment. Place warning signs.
- With a dry duster, dust from top to bottom using smooth strokes. On desks and tables dust the top first, dust each leg from top to bottom in one straight continuous stroke.
- With filing cabinets/bookcases dust the top of the unit, each visible side from top to bottom and lastly the front from top to bottom. Clean duster as often as necessary by putting the duster in the rubbish sack, closing the end and shaking the sack to remove the dust. When finished clean equipment and return to store.
Damp Wiping
- Assemble check equipment. Place warning signs. Dust the furniture as described above.
- Prepare cleaning solution in a bucket according to the manufacturers instructions adding the solution to the water.
- Place cloth in cleaning solution and wring out almost dry. Wipe surfaces from top to bottom using smooth straight strokes. Damp wipe furniture the same as dusting. When finished clean equipment and return to store.
Washing
- Assemble check equipment. Place warning signs. Dust/damp wipe the furniture.
- Prepare cleaning solution in the trigger spray bottle, according to the manufacturers instructions, adding the solution to the water. Fill two buckets with clean water.
- With the trigger spray, spray solution onto the furniture, taking care not to spray surrounding surfaces. Allow one minute for the solution to activate. Wash the furniture with a cloth using straight, continuous, overlapping strokes.
- Rinse the cloth in clean water as often as necessary to remove soil. Apply clean rinse water from the second bucket to the furniture, then wipe dry with a clean cloth. When finished, clean equipment and return to store.
Polish Application
- Assemble check equipment. Place warning signs. Dust / damp wipe / wash the furniture.
- Apply polish sparingly to the surface or spray polish onto a cloth. When dry buff the surface to a high sheen with a clean dry cloth. When finished clean equipment and return to store.
SAFETY
- Wear protective gloves.
- Avoid splashing cleaning solution on surrounding furniture, curtains or blinds. Wipe splashes immediately.
- Do not spray aerosol polish directly onto furniture standing near or on hard floors.
CARE OF EQUIPMENT
- Wash trigger spray, rinse out and store upside down.
- Wash buckets, wipe with a clean cloth store upside down.
- Wash out dusters and cloth and hang up to dry.
EQUIPMENT
1 Trigger Spray Bottle
2 Buckets
Cleaning Agent & Dispenser
Colour Coded Cloths
Dusters
Protective Gloves
Rubbish Sack
Warning Signs
METHOD Dusting
- Assemble check equipment. Place warning signs.
- Open the door, and with a dry duster open door and dust inner part of door frame, starting from the top dust inner face of frame and work down one side using straight continuous strokes. Repeat on the other side.
- Keep door open and dust front side of door from top to bottom including handle and kick plate. Dust top of the door and work down both sides using straight continuous strokes. Dust front side of frame from the top down.
- Close door and dust back side of frame from the top down on both sides. Dust back side of door from the top down. Include handle and kick plate.
Damp Wiping
- Assemble check equipment. Place warning signs. Dust door and frame.
- Prepare cleaning solution in a bucket according to the manufacturers instructions adding the solution to the water. Place cloth in the solution and wring out almost dry.
- Open door and clean inner face of frame on both sides working from the top down. Clean front face of door frame starting from the top and working down both sides.
- Keep the door open and wipe the door from the top down to include handles and kick plates. Repeat the method for the back side of both door and frame. Rinse out cloth in a clean bucket of water as often as necessary. When finished clean equipment and return to store.
Washing
- Assemble check equipment. Place warning signs. Dust / damp wipe door and frame.
- Prepare cleaning solution in trigger spray according to the manufacturers instructions adding the solution to the water. Fill two buckets with clean water.
- Open door and spray inner face of the frame, starting from the bottom working up both sides and along the top. Spray the front side of the frame using the same method, allow one minute for the solution to activate.
- With a cloth wash from the bottom the inner and front sides of the frame. Rinse wipe the frame, using a clean cloth and the second bucket of water, working from the top down.
- Open door and spray the solution on the door from the bottom upwards to include all the furniture. Wash the door from the bottom up. Rinse wipe the door with a clean cloth and the second bucket of water, working from the top down.
- Repeat the process for the back side of the door and frame. Rinse the cloth as often as necessary in clean water.
SAFETY
- Wear protective gloves. Avoid splashing cleaning solution onto surrounding furniture.
CARE OF EQUIPMENT
- Wash trigger spray bottle, store upside down. Wash buckets, wipe, store upside down. Wash out cloths, hang up to dry.
EQUIPMENT
1 High Pressure Jetting Machine (if applicable)
Face Mask
Eye Shield & Protective Gloves
Trigger Spray
Buckets & Colour Coded Cloths
Graffiti Remover (various types for surfaces to be cleaned)
Ghosting Agents
Paint Brushes/Sponges
Wire Brush
Paint & Paint Stripper (if applicable)
Cleaning Agent & Dispenser
Warning Signs
PREPARATION AND PLANNING
Always carry out an initial test on every surface to be treated as each one will present a different problem. The type of graffiti paint may also vary, if at all possible testing should be carried out in a place which is out of sight. The results of the initial tests will determine which chemicals and methods are to be used. The surrounding area should be studied before graffiti removal is undertaken.
Before commencing work it may be necessary to close off areas to Client staff, other contractors and passengers for the duration of the work. If indeed this is the case permission must be obtained from the engineering section of the Client and the Client Supervisor.
It is important that arrangements are made for the provision of water and electricity, if a high pressure water jet is to be used.
The objective is to remove the graffiti from the surface on which it exists without changing the original looks, structure or form of the surface. It is essential to analyse both the surface and type of graffiti before deciding on the method of removal and which chemical agents to use.
METHOD Non Painted Surface
1.1. Assemble check equipment. Place warning signs. Put on protective gloves and face mask. Fill bucket with water.
1.2. Apply graffiti remover with a brush working from the bottom to the top, and from the outside to the centre of the affected areas. Rinse with water from top to bottom.
1.3. If using a high pressure hose, reduce the pressure gradually away from the centre towards the edges.
1.4. If using cloths or sponges wash from top to bottom, working from inside to outside. Rinse wipe with a clean dry cloth. If all the graffiti has not been removed, allow surfaces to dry and apply a suitable ghosting agent.
Painted Surfaces
2.1. Test a small area to see if the surface will withstand the use of graffiti remover.
2.2. Soak a clean cloth with graffiti remover, apply to affected areas, using a clean part of the cloth rub the graffiti using short application periods, working from inside to outside and top to bottom.
2.3. Following the initial removal the surface should be rinsed with water or wiped with a clean wet cloth. Work from top to bottom. If all the graffiti is not removed, allow the surface to dry and apply a suitable ghosting agent.
2.4. If the painted surface does not withstand the remover, isolate the graffiti with a suitable lacquer paint and repeat the above process. When surface is dry repaint the affected area.
Plastic Surfaces
3.1. Test a small area to see if it will withstand the graffiti remover.
3.2. Spray graffiti remover onto a clean dry cloth, wipe over the affected area, repeat the process as necessary, ensuring the remover does not remain in contact with the plastic for more than two minutes. Rinse with water or wipe with a clean wet cloth.
Wood Surfaces
4.1. Apply graffiti remover or paint stripper to affected areas with a brush. Leave to act on surface for thirty minutes. Work from bottom to top and outside towards the centre. Wash off top to bottom, rinse wipe with a clean dry cloth.
4.2. If using a high pressure jet, work from top to bottom, gradually reducing the pressure away from the centre towards the edges. The spray nozzle must be more than 10 centimetres from the surface of the wood otherwise there is a risk of splitting the surface.
SAFETY
- Ensure areas are well ventilated.
- Check high pressure jet for safety, particularly plugs, cables and hoses. Do not plug the jet in until it has been assembled and is ready for use. When the jet is in use the area must be cordened off.
- The face mask eye shield and gloves must be worn.
- Contain any spillages with absorbent cloth or sand discard with regards to COSHH. regulations. Dispose of all used cloths with regards to the above regulations. In cases of accidents follow the manufacturers instructions and seek immediate medical attention.
- Be careful when using high pressure jets near light fittings.
- Do not leave equipment lying around.
CARE OF EQUIPMENT
- Check the high pressure jet, particularly plugs, cables and hoses. Do not plug in jet washer until has been assembled and is ready for use. Wash the jet washer and wipe with a clean dry cloth. Remove the hose and nozzles when storing the machine.
- Wash out brushes and sponges in a solution of detergent according to the manufacturers instructions. Wash buckets wipe with a clean cloth and store upside down. Wash trigger spray and store upside down.
- Wash wire brush and store head up.
- Wash and rise out trigger spray & bottle, store upside down.
- Wash out cloths and hang up to dry.